
EOS Utility is a software developed by Canon that allows photographers to control and customize their Canon EOS camera settings directly from a computer. It simplifies remote shooting, image transfer, and camera adjustments, making it ideal for studio environments, time-lapse photography, or when precise control is required. Customizing camera settings through EOS Utility enhances workflow, offering convenience and flexibility for various photography styles. This guide explores how you can use EOS Utility to adjust key camera settings and optimize your photography experience without needing to physically touch the camera.
Overview of Camera Settings in EOS Utility
EOS Utility provides an interface that allows photographers to remotely control and customize various camera settings from a computer. This feature is particularly useful for photographers who want to adjust settings without physically touching the camera, such as when it’s placed on a tripod or being used in studio photography. Below are the key camera settings you can customize through EOS Utility:
1. Exposure Settings
- Shutter Speed: You can adjust the duration for which the camera’s shutter remains open, controlling how much light enters. Longer shutter speeds allow more light and are ideal for low-light conditions or long exposure shots, while faster shutter speeds are perfect for freezing motion.
- Aperture (f-stop): EOS Utility lets you adjust the aperture, which controls how wide the lens opens. This affects both the exposure and depth of field. A smaller f-stop (e.g., f/1.8) creates a shallow depth of field with a blurred background, while a larger f-stop (e.g., f/16) provides a deep depth of field with more of the scene in focus.
- ISO: You can change the camera’s ISO sensitivity to light. Lower ISO values (e.g., ISO 100) are ideal for bright conditions, while higher ISO values (e.g., ISO 1600 or 3200) help in low-light situations but can introduce noise into the image.
2. Focus Mode
- Autofocus (AF): EOS Utility allows you to set the camera to autofocus mode, where the camera automatically adjusts the lens to focus on the subject. You can choose from several autofocus modes, such as One-Shot AF (for still subjects), AI Servo AF (for moving subjects), and AI Focus AF (which automatically switches between One-Shot and AI Servo based on subject movement).
- Manual Focus (MF): If you prefer complete control over the focus, EOS Utility lets you switch the camera to manual focus mode, allowing you to adjust the focus manually.
3. White Balance
- White Balance: This setting ensures that the colors in your images appear natural under different lighting conditions. EOS Utility lets you choose from preset white balance options (e.g., Daylight, Cloudy, Tungsten) or manually adjust the white balance to suit specific lighting conditions, ensuring accurate color reproduction.
4. Drive Mode
- Single Shot: When set to this mode, the camera will take one photo each time the shutter button is pressed.
- Continuous Shooting: In this mode, the camera will take multiple photos in quick succession as long as the shutter button is held down. This is ideal for capturing fast-moving subjects.
- Self-Timer: EOS Utility allows you to set the self-timer function, which delays the shutter release by a specified amount of time after pressing the shutter button. This is helpful for avoiding camera shake in long exposure shots or for taking self-portraits.
5. Picture Style and Image Quality
- Picture Style: EOS Utility enables you to choose or adjust the picture style (e.g., Standard, Portrait, Landscape, Neutral, Faithful, etc.) which affects the color, contrast, and sharpness of your photos. This allows you to match the camera’s output to your desired artistic style.
- Image Quality: You can adjust the resolution and compression settings for the images. Common options include RAW (for maximum editing flexibility), JPEG (for smaller file sizes), and a combination of both (RAW+JPEG). This choice affects both the image quality and the file size.
6. Flash Settings
- Flash Mode: EOS Utility allows you to control the camera’s flash settings remotely. This includes options like Flash On, Flash Off, Red-eye Reduction, or Slow Sync Flash, depending on the shooting situation.
- Flash Exposure Compensation: You can adjust the intensity of the flash, increasing or decreasing the exposure to achieve the desired lighting for your subject.
How to Customize Settings in EOS Utility
Customizing camera settings using EOS Utility is a straightforward process, allowing you to control many of your camera’s settings remotely from your computer. Here’s a step-by-step guide to help you navigate the software and make the necessary adjustments:
1: Install EOS Utility
- Ensure that you have EOS Utility installed on your computer. This software typically comes with your Canon camera, or you can download it from Canon’s official website.
- Launch EOS Utility on your computer after installation.
2: Connect Your Camera
- Use a USB cable to connect your Canon EOS camera to your computer.
- Power on your camera. EOS Utility will automatically recognize the connected device and display the main interface.
- If EOS Utility doesn’t launch automatically, open it manually through your applications.
3: Open Remote Shooting
- From the EOS Utility interface, select “Remote Shooting”. This option allows you to control the camera settings directly from your computer.
- The camera’s live view feed will be displayed on your screen, and you’ll be able to access various settings from within the interface.
4: Access the Camera Settings
Once in the Remote Shooting window, you’ll find a set of tabs or buttons that represent different camera settings.
- Exposure settings: Adjust Shutter Speed, Aperture, and ISO.
- Focus Mode: Switch between autofocus and manual focus modes.
- White Balance: Choose from preset options or set a custom white balance.
- Picture Style: Change the picture style for different looks (e.g., Standard, Landscape, Portrait).
- Drive Mode: Switch between different shooting modes (single shot, continuous, or self-timer).
- Flash Settings: Adjust flash output or disable flash, depending on your setup.
5: Adjust Settings
Select any setting you want to customize.
- For example, to change shutter speed, click on the shutter speed option and either manually adjust it or use the available slider.
- Similarly, you can change the ISO or aperture by selecting those settings and adjusting the sliders.
6: Apply Changes
Once you’ve adjusted the settings to your liking, you can either:
- Click Apply or Set (depending on the version of EOS Utility) to make the changes active on the camera.
- You may see a live update in the camera’s viewfinder on the computer screen if you’ve enabled live view.
7: Additional Customizations
- Custom Functions (C.Fn): If your camera allows custom functions (C.Fn), you can usually access these from within EOS Utility as well. These may allow for further detailed adjustments, such as configuring button layouts or exposure options.
8: Use Live View for Precision
- In Live View Mode, you can see how your adjustments affect the image in real time. This is especially useful for fine-tuning settings like focus or exposure without physically touching the camera.
- You can manually adjust focus or use autofocus to ensure the sharpest focus point.
- If you’re using remote shooting for long exposure or studio work, the live view helps ensure that your composition and settings are perfect.
9: Save and Test
- After making adjustments, take a few test shots to verify that the settings you customized are giving the desired results.
- You can save a set of settings or use the same settings for future shoots.
10: Disconnect and Finish
- Once you’ve customized your settings and finished your remote shooting session, simply disconnect your camera from the computer.
- Close EOS Utility, or leave it open if you plan to use it again soon.
Advanced Features for Customization
EOS Utility offers several advanced customization features that allow photographers to fine-tune their camera settings for more precise control over their shooting experience. These features help photographers achieve the exact image quality, exposure, and focus settings required for specialized photography, whether in studio settings, landscape photography, or portrait work. Below are some key advanced features:
1. Exposure Compensation and Bracketing
- Exposure Compensation: This feature allows you to adjust the exposure level (brightness) of your shots. If your image is too dark (underexposed) or too bright (overexposed), you can fine-tune the exposure in small increments. This is particularly useful when shooting in tricky lighting conditions or for creative control over the final image’s look.
- How to use: Within EOS Utility, you can adjust the exposure compensation slider to correct the exposure without changing your aperture, shutter speed, or ISO settings. The adjustment will affect the image’s brightness directly.
- Exposure Bracketing: Exposure bracketing involves taking multiple shots at different exposure levels (e.g., one at normal exposure, one underexposed, and one overexposed) to ensure you capture the perfect exposure. This is especially useful in high-contrast scenes (like landscapes) or when creating HDR (High Dynamic Range) images.
- How to use: EOS Utility allows you to set the bracketing intervals (e.g., 1/3 stop, 2/3 stop), and the camera will automatically take a series of shots at the specified exposure levels.
2. Custom Functions (C.Fn)
- Canon cameras feature a set of Custom Functions (C.Fn) that enable you to tweak various aspects of your camera’s behavior beyond the usual settings. These can range from how autofocus operates to how your camera handles specific exposure settings or button assignments.
- Example functions include:
- Autofocus settings: Adjust focus behavior for fast-moving subjects or in low-light conditions.
- Shutter/AF button customization: Customize how the camera’s shutter button or autofocus button responds to different actions, such as continuous autofocus during burst shooting.
- ISO settings: Control how the camera switches between ISO settings in different lighting conditions.
- How to use: You can modify these custom functions through EOS Utility by accessing the “Custom Functions” menu. These settings allow for a more tailored shooting experience based on personal preference or specific shooting conditions.
- Example functions include:
3. Live View Mode
- Live View Mode in EOS Utility allows you to view the live feed from your camera’s sensor on your computer screen. This is a crucial tool for precision in photography, especially for tasks like manual focusing, composition, and exposure adjustments.
- How it helps with customization:
- Manual Focus Assistance: EOS Utility provides tools to help you achieve precise manual focus. For example, magnifying a section of the frame can ensure that your subject is in sharp focus, which is especially useful for macro or portrait photography.
- Exposure Adjustments: You can view how adjustments to shutter speed, aperture, and ISO impact the live image, helping you make precise decisions in real time.
- Live Histogram: Some cameras allow you to see a live histogram while using live view, giving you immediate feedback on exposure levels and whether the image is overexposed or underexposed.
- Framing and Composition: The ability to view your shot on a larger screen helps with precise framing and composition. This is particularly helpful for shots where fine-tuning is necessary.
4. Picture Style Adjustments
- Picture Styles control the overall aesthetic of your images by adjusting parameters like contrast, saturation, sharpness, and color tone. EOS Utility allows you to select and fine-tune these styles, giving you creative control over the final output, especially when working with RAW files.
- Common Picture Styles:
- Standard: Balanced for general-purpose use.
- Portrait: Optimized for skin tones and softer colors.
- Landscape: Vivid colors and increased contrast, ideal for landscape shots.
- Neutral or Faithful: For photographers who prefer to adjust colors and tones during post-processing.
- How to use: You can choose from preset styles or create a custom one within EOS Utility by adjusting the settings for contrast, sharpness, and color saturation.
- Common Picture Styles:
5. Remote Control of Focus Points
- EOS Utility allows you to remotely adjust the focus points of your camera, which can be very helpful for studio setups or when shooting subjects in tricky positions.
- How to use: When connected to the camera through EOS Utility, you can select the desired focus point through the software interface, rather than manually adjusting it on the camera itself. This is particularly useful when you need to change the focus point quickly or remotely during a shoot.
6. Lens Adjustments (Focus Microadjustment)
- Many Canon cameras offer lens microadjustment settings, allowing you to fine-tune autofocus accuracy for specific lenses. This is particularly important if you’re using lenses with slight autofocus inaccuracies, ensuring sharp focus at every shot.
- How to use: Through EOS Utility, you can adjust the autofocus calibration for each lens to ensure more precise and consistent results, particularly with lenses that are prone to front- or back-focusing issues.
Limitations of Customization
While EOS Utility offers a wide range of camera settings that can be customized remotely, there are some limitations to be aware of. Here are the main points to consider:
1. Not All Camera Settings Are Accessible Remotely
- Limited Access to Menu Settings: Some advanced settings or features found within the camera’s main menu may not be available for remote control through EOS Utility. For instance, settings related to the camera’s hardware, such as battery management, may not be adjustable through the software.
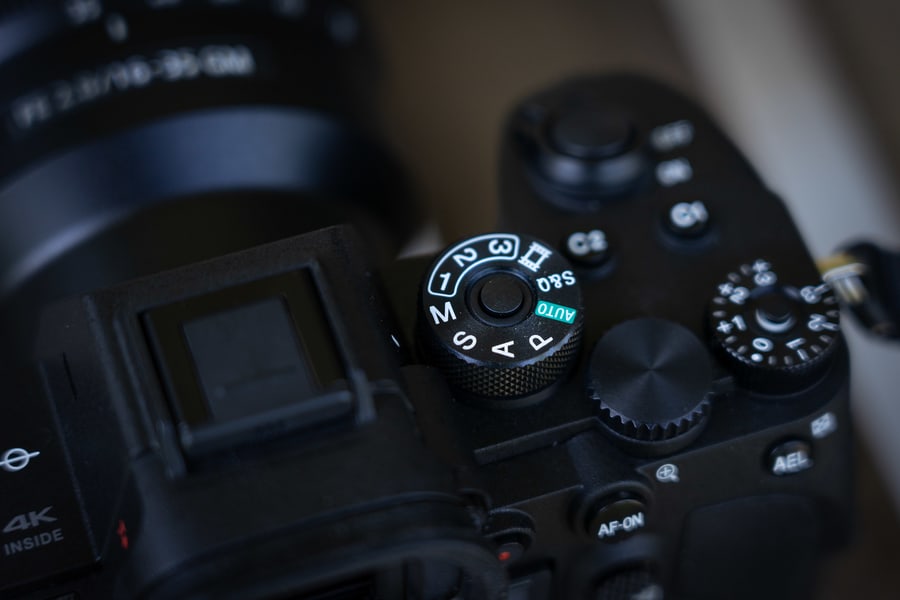
- Physical Controls: Some settings that require physical manipulation of the camera, like rotating dials or adjusting certain buttons, cannot be customized through EOS Utility. You still need to physically adjust the camera for these settings.
2. Real-Time Adjustment Restrictions
- Some settings require the camera to be idle: Certain changes, such as adjusting aperture or shutter speed during shooting, might require you to stop or pause the current shooting process. EOS Utility does not always allow real-time adjustments while the camera is capturing images.
- Live View Limitations: While EOS Utility does support Live View, the live feed may not be as smooth or responsive as directly using the camera’s built-in display, especially in real-time scenarios. Additionally, in some cameras, adjusting settings while in Live View mode may be limited.
3. No Access to Certain Advanced Features
- Custom Buttons and Assignments: Some cameras have customizable buttons or control assignments (e.g., setting a button to change focus modes or active AF points). These might not be fully programmable or customizable via EOS Utility.
- Multiple Custom Settings: While EOS Utility allows some customization of camera settings, it may not allow you to fully program and save multiple customized shooting modes or “Custom Modes” (C1, C2, etc.) that can be directly accessed on the camera body.
4. No Physical Interaction for Lens Adjustments
- EOS Utility cannot control or adjust any physical aspects of the lens, such as zoom or manual focus. While you can control autofocus settings, fine-tuning or manual focus adjustments typically need to be done directly on the camera or lens itself.
5. Camera-Specific Differences
- The extent of customization varies depending on the camera model. Not all features available on higher-end Canon cameras are available on entry-level models. For example, more advanced EOS models may offer additional remote-control features (e.g., adjusting focus points) that may not be available in lower-tier models.
6. Limited Video Settings Control
- For users who shoot video, EOS Utility allows some control over basic settings like focus and exposure. However, some more advanced video features, such as frame rate, bitrate, or specific video settings, might not be customizable directly via EOS Utility.
7. Compatibility and Software Updates
- Certain camera models may require a specific version of EOS Utility to access all features, and not every camera is supported in every version of the software. Additionally, if the software or camera firmware is not up-to-date, it could limit the customization options available.
Practical Applications of Customizing Settings
Customizing settings with EOS Utility can significantly enhance a photographer’s workflow and image quality. Some practical applications include:
- Studio Photography: Remote control of exposure, focus, and settings to prevent camera shake and save time.
- Live View Mode: Real-time focus and composition adjustments, ideal for macro and detailed shots.
- Time-Lapse Photography: Remote adjustments for consistent exposure and settings across all frames.
- Event and Portrait Photography: Quick setting changes during fast-paced shoots without interrupting the session.
- Multi-Camera Setups: Ensures consistent settings across multiple cameras remotely.
- Astrophotography: Long exposure and precise settings adjustments without touching the camera.
- Image Transfer and Backup: Automates image downloads and organizes files during shoots.
These customizations streamline processes, save time, and allow for more precise control over the final image.
Troubleshooting Common Issues
- Camera Not Connecting:
- Check the USB cable and port.
- Set the camera to the correct mode (e.g., “PC” or “Remote”).
- Ensure EOS Utility and camera firmware are updated.
- EOS Utility Not Recognizing Camera:
- Check camera mode.
- Update USB drivers.
- Close other programs using the camera.
- EOS Utility Freezing or Not Responding:
- Restart EOS Utility and your computer.
- Reinstall EOS Utility if needed.
- Close background programs to free up system resources.
- Settings Not Saving:
- Click “Apply” in EOS Utility to save changes.
- Ensure settings match on both the camera and software.
- Restart camera and software to sync.
- Image Transfer Issues:
- Check camera mode (ensure “PC” or “Playback” mode is active).
- Use a memory card reader if transfer fails.
- Format the card if needed.
- Live View Not Working:
- Ensure Live View is activated on the camera.
- Check the shooting mode and ensure compatibility.
- Update EOS Utility and camera firmware.
These quick steps should help resolve common issues with EOS Utility.
Conclusion
EOS Utility offers photographers the ability to customize various camera settings remotely, enhancing workflow and control. By adjusting settings such as exposure, focus, and white balance, users can tailor their camera to specific needs. Exploring these features can significantly improve the shooting process, making EOS Utility a valuable tool for both beginners and professionals.