
Prerequisites
-
Compatible Canon Camera Models
- Ensure your Canon camera model is compatible with EOS Utility. Most Canon DSLR and mirrorless cameras support this software, but it’s always a good idea to check Canon’s official website or your camera’s user manual for compatibility details.
-
Required Hardware
- Camera: You’ll need a Canon camera that supports direct photo transfer via EOS Utility.
- Computer: A computer running a compatible operating system (Windows or macOS) with sufficient storage space for your photos.
- USB Cable: A USB cable that connects your camera to your computer. Typically, this is the cable that came with your camera, or a compatible one specified in your camera’s documentation. If your camera supports wireless transfer, you may use a Wi-Fi connection instead.
-
Software Requirements
- EOS Utility: The software must be installed on your computer. Download the latest version from Canon’s official website. Ensure that your operating system is compatible with the version of EOS Utility you are installing.
- Operating System Compatibility: Check that your computer’s operating system (Windows 10, Windows 11, macOS Catalina, macOS Big Sur, etc.) is supported by the version of EOS Utility you plan to use. Software updates might be necessary to ensure compatibility.
-
Camera Settings
- Camera Mode: Set your camera to the appropriate mode for photo transfer. This may include turning on the camera, selecting a specific connection mode (e.g., “PC Connect” mode), or configuring wireless settings if applicable.
Setting Up EOS Utility
To effectively transfer photos from your Canon camera to your computer using EOS Utility, follow these steps to set up the software and establish a connection between your devices:
1. Download and Install EOS Utility
- Visit Canon’s Official Website:
- Go to the Canon Support page for your region.
- Find Your Camera Model:
- Search for your specific Canon camera model to find compatible software.
- Download EOS Utility:
- Select the latest version of EOS Utility compatible with your camera and operating system.
- Install the Software:
- Open the downloaded file and follow the on-screen instructions to install EOS Utility on your computer.
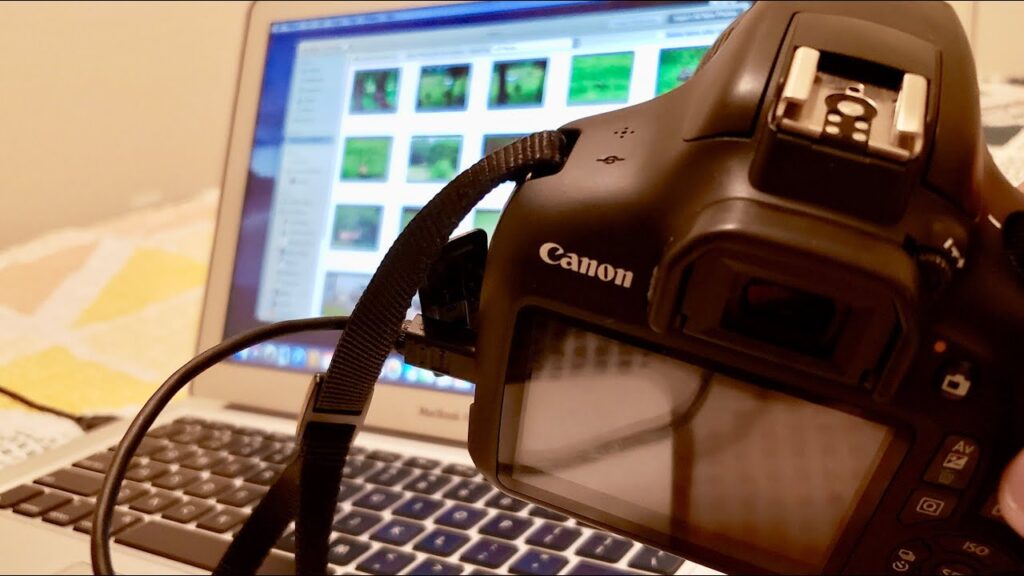
2. Connect Your Camera to the Computer
- Use a USB Cable:
- Connect your camera to your computer using the USB cable that came with your camera.
- Ensure that the cable is securely plugged into both the camera’s USB port and the computer’s USB port.
- Alternative Connection (Wireless):
- If your camera supports Wi-Fi, you can connect wirelessly by following Canon’s instructions for setting up a Wi-Fi connection.
- This usually involves connecting your camera to the same Wi-Fi network as your computer and configuring wireless settings in EOS Utility.
3. Turn On Your Camera
- Power On:
- Turn on your Canon camera and set it to the appropriate mode for transferring photos (e.g., Playback mode).
- Camera Settings:
- Ensure that the camera is set to allow remote control or photo transfer. Check your camera’s manual if you need to adjust any settings.
4. Launch EOS Utility
- Open the Software:
- Locate and open the EOS Utility application on your computer.
- Initial Setup:
- The software should detect your connected camera automatically. If it doesn’t, ensure the camera is turned on and properly connected.
5. Configure Settings in EOS Utility
- Select the Function:
- Choose the appropriate function within EOS Utility for transferring photos. Options typically include:
- Auto Download: Automatically transfers all new photos from the camera.
- Manual Download: Allows you to select specific photos to transfer.
- Choose the appropriate function within EOS Utility for transferring photos. Options typically include:
- Choose Destination Folder:
- Specify where you want the transferred photos to be saved on your computer.
Using EOS Utility for Photo Transfer
1. Launching EOS Utility
- Open EOS Utility: Double-click the EOS Utility icon on your desktop or find it through your computer’s Start menu or application launcher.
- Interface Overview: The main window of EOS Utility typically presents several options, such as remote shooting, camera settings, and photo download.
2. Connecting Your Camera
- Ensure Proper Connection: Make sure your camera is properly connected to your computer using a USB cable or that it’s set up for a wireless connection if supported.
- Camera Mode: Set your camera to the correct mode for file transfer. For most Canon models, you may need to set it to playback mode or connect it via the appropriate menu option.
3. Selecting the Photo Transfer Function
- Auto Download:
- Enable Auto Download: EOS Utility may automatically detect when photos are on your camera and prompt you to download them.
- Configure Settings: If you prefer, you can configure the auto-download settings, including the destination folder on your computer and whether to delete photos from the camera after transfer.
- Manual Download:
- Choose Manual Download: Click on the “Download Images” or “Get Images” button in EOS Utility.
- Select Photos: You’ll be presented with a view of the photos on your camera. You can select individual photos or choose to download all of them.
- Set Destination: Choose where on your computer you want to save the photos. You can specify a folder or create a new one.
4. Initiating the Transfer
- Start Transfer: Once you’ve made your selections, click the button to begin the transfer. This might be labeled “Download,” “Transfer,” or something similar.
- Monitor Progress: EOS Utility will show the progress of the transfer. You can monitor the status to ensure that all photos are being transferred correctly.
5. Completing the Process
- Transfer Completion: Once the transfer is complete, EOS Utility will typically notify you. You can then access the transferred photos in the designated folder on your computer.
- Check and Organize: Review the photos, and organize them as needed. You might want to create subfolders or rename files for easier management.
Managing Transferred Photos
After you’ve successfully transferred your photos from your Canon camera to your computer using EOS Utility, the next step is to organize and manage them effectively. Here’s how to do it:
1. Accessing Photos on Your Computer
- Locate the Destination Folder: By default, EOS Utility saves your photos in a specific folder on your computer. You can find this folder by navigating to the location you selected during the transfer process.
- Check File Formats: Photos are usually saved in JPEG or RAW formats. Ensure you have the necessary software to view and edit these files.
2. Organizing Photos
- Create Folders: Organize your photos into folders based on events, dates, or subjects. For example, you might have folders named “Vacation 2024” or “Family Photos.”
- Rename Files: Consider renaming files for easier identification. Use descriptive names and include dates if necessary. For example, “2024-08-24_GrandCanyon.jpg.”
- Use Metadata: Many photo management programs can sort photos based on metadata like date taken, camera settings, and location. This can help you organize and find photos more efficiently.
3. Backing Up Photos
- Create Backups: Always create backups of your photos to prevent data loss. You can use external hard drives, cloud storage services (like Google Drive, Dropbox, or iCloud), or both.
- Regular Updates: Regularly update your backups to include new photos. Set reminders to ensure you’re consistently backing up your work.
4. Editing Photos
- Use Editing Software: Open your photos in editing software such as Adobe Lightroom, Photoshop, or other programs compatible with your file formats. Perform basic adjustments like cropping, color correction, and sharpening.
- Save Edits: Save edited versions of your photos in a separate folder or under a different file name to keep the original files intact.
5. Deleting Unwanted Photos
- Review and Delete: Go through your photos and delete any that are blurry, duplicates, or not needed. This helps in keeping your storage organized and frees up space.
- Use Software Tools: Some photo management software includes features to help identify and delete duplicate or low-quality images.
6. Sharing Photos
- Prepare for Sharing: Resize or adjust photo quality if you plan to share them online or via email. Most photo editing software includes export options for sharing.
- Select Sharing Platforms: Choose appropriate platforms for sharing your photos, such as social media, photo-sharing sites, or direct sharing with friends and family.
7. Maintaining an Organized System
- Set a Routine: Establish a routine for organizing and backing up your photos to ensure you maintain a consistent and efficient workflow.
- Regular Reviews: Periodically review your photo storage system to make adjustments as needed.
Troubleshooting
When using EOS Utility to transfer photos, you might encounter some common issues. Here’s how to address them:
1 Connection Problems
- Issue: Camera Not Recognized
- Solution:
- Check Connections: Ensure that the USB cable is securely connected to both the camera and the computer. If using a wireless connection, verify that both devices are on the same network.
- Try a Different Cable/Port: Sometimes the cable or USB port may be faulty. Try using a different USB cable or port on your computer.
- Restart Devices: Restart both the camera and the computer to reset any temporary connection issues.
- Update Drivers: Ensure that your computer’s USB drivers are up-to-date. You may need to update or reinstall camera drivers if they are outdated.
- Solution:
- Issue: EOS Utility Not Launching or Crashing
- Solution:
- Check Compatibility: Ensure that your version of EOS Utility is compatible with your operating system. Visit Canon’s website to download the latest version if needed.
- Reinstall Software: Uninstall and then reinstall EOS Utility to fix any software corruption issues.
- Check for Conflicts: Disable any third-party antivirus or firewall software that might be blocking EOS Utility.
- Solution:
2. Photo Transfer Issues
- Issue: Photos Not Appearing in the Selected Folder
- Solution:
- Verify Folder Settings: Double-check that you have selected the correct destination folder in EOS Utility for the photo transfer.
- Check Permissions: Ensure that you have write permissions for the destination folder on your computer.
- Inspect File System: Confirm that there is enough storage space available on your computer for the transferred photos.
- Solution:
- Issue: Transfer Speed is Very Slow
- Solution:
- Check Cable/Connection: Ensure that you’re using a high-quality USB cable and that the connection is secure.
- Close Other Applications: Close unnecessary applications on your computer to free up system resources.
- Update Software/Firmware: Make sure both EOS Utility and your camera’s firmware are updated to the latest versions for optimal performance.
- Solution:
3. General Errors
- Issue: Error Messages or Warnings
- Solution:
- Read the Error Message: Carefully read any error messages or warnings provided by EOS Utility. They often contain clues for troubleshooting.
- Consult Documentation: Refer to the EOS Utility user manual or Canon’s support website for specific error codes or messages.
- Contact Support: If the issue persists, contact Canon customer support for further assistance.
- Solution:
4. Additional Resources
- Canon Support Website: Provides updates, FAQs, and troubleshooting guides.
- User Manuals: Detailed guides for EOS Utility and camera models.
- Community Forums: Online forums where users share solutions and tips.
Conclusion
In conclusion, transferring photos directly to your computer using EOS Utility is a straightforward and efficient process that enhances your workflow and helps you manage your images effectively. By following the steps outlined above, you can quickly and easily move your photos from your Canon camera to your computer, ensuring they are safely stored and ready for editing or sharing. With EOS Utility’s features, you not only streamline your photo transfer process but also gain access to additional tools that can further support your photography needs. We encourage you to explore these features and make the most of what EOS Utility has to offer.