
Getting Started with EOS Utility
EOS Utility is a software application developed by Canon that provides a range of functions to enhance your photography experience with Canon cameras. This section will guide you through the initial setup and basic usage of EOS Utility.
1.1 Installation and Setup
1. Downloading EOS Utility:
- Visit Canon’s Official Website: Go to the Canon support page for your specific camera model.
- Select Your Camera Model: Choose your camera from the list to find the appropriate version of EOS Utility.
- Download the Software: Locate the download link for EOS Utility and click to begin downloading. Ensure that you download the version compatible with your operating system (Windows or macOS).
2. Installing EOS Utility:
- Run the Installer: Once the download is complete, open the installer file. On Windows, this will typically be a .exe file; on macOS, it will be a .dmg file.
- Follow Installation Prompts: Follow the on-screen instructions to install EOS Utility. You may need to agree to the terms of service and choose an installation location.
- Complete Installation: Once the installation is finished, you may need to restart your computer to complete the setup.
3. Connecting Your Camera:
- Connect via USB Cable: Use the supplied USB cable to connect your Canon camera to your computer. Ensure that both the camera and computer are powered on.
- Turn On the Camera: Switch your camera to the appropriate mode for connecting to EOS Utility, usually the ‘PC Connect’ mode or simply ‘On’.
- Launch EOS Utility: Open the EOS Utility application on your computer. It should detect your camera automatically if the connection is properly established.
4. Camera Detection:
- Automatic Detection: Upon launching, EOS Utility will automatically detect the connected camera and display a connection confirmation window.
- Manual Detection: If the camera is not detected, check the connection, ensure the camera is turned on, and verify that the correct USB port and cable are used.
5. Initial Setup:
- Software Preferences: Configure basic preferences such as language, default save locations, and other settings through the EOS Utility settings menu.
- Camera Settings Sync: Some features may require syncing camera settings with EOS Utility. Follow any on-screen prompts to ensure that the software and camera settings are aligned.
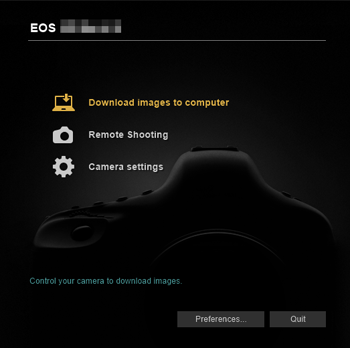
6. Exploring the Interface:
- Main Dashboard: Familiarize yourself with the EOS Utility interface, which typically includes options for remote shooting, image transfer, and camera settings.
- Navigation: Explore the different tabs and menus to understand the available functions and tools.
Remote Shooting
Remote shooting allows you to control your Canon camera from a computer using EOS Utility software. This feature is particularly useful for capturing images in situations where direct camera operation is impractical, such as in studio settings, wildlife photography, or self-portraits. Here’s a breakdown of the main features and functionalities:
1. Live View Shooting
- Activating Live View Mode
- Open EOS Utility and connect your camera to the computer via USB.
- In the EOS Utility window, select the “Remote Shooting” option.
- Click on “Live View Shoot” to enable Live View mode on your camera. This allows you to see a live feed of what the camera’s lens is seeing.
- Adjusting Camera Settings Through Live View
- Once in Live View mode, you can adjust various settings such as shutter speed, aperture, and ISO directly from the EOS Utility interface.
- The Live View window displays real-time changes, allowing you to fine-tune the composition and exposure of your shot.
2. Capturing and Saving Images Remotely
- Taking Photos Remotely
- In the Remote Shooting window, you will find a “Shoot” button. Clicking this button will take a photograph using the camera.
- You can also set up the camera to take multiple shots with features like continuous shooting or interval timer shooting.
- Saving and Organizing Images
- After capturing images, you can choose to save them directly to your computer.
- EOS Utility allows you to select a folder on your computer where the images will be stored, making it easier to manage and organize your photo files.
3. Adjusting Camera Settings
- Exposure Settings
- Adjust settings like shutter speed, aperture, and ISO from the Remote Shooting interface. These adjustments will affect how the camera captures light and detail in your photos.
- Focus Control
- You can switch between manual and auto-focus modes. In manual mode, you might need to adjust the focus directly from the camera or through the software if supported.
- White Balance and Picture Styles
- Set the white balance to match the lighting conditions of your shoot, and select picture styles that affect the color and tone of your images.
4. Additional Features
- Bracketing
- Set up exposure bracketing to take multiple shots at different exposure levels, which can be useful for HDR (High Dynamic Range) photography.
- Remote Triggering
- Use a remote trigger to take photos at scheduled times or intervals, which is ideal for time-lapse photography or capturing moments without physically interacting with the camera.
Camera Settings Control
EOS Utility provides a comprehensive suite of tools to control your camera’s settings remotely. Here’s a detailed look at the camera settings you can manage:
1. Exposure Settings
- Shutter Speed: Control how long the camera’s shutter remains open to capture light. You can adjust it to be faster for capturing fast-moving subjects or slower for long exposure shots.
- Aperture: Adjust the size of the lens opening that lets light into the camera. A larger aperture (smaller f-number) allows more light and creates a shallower depth of field, while a smaller aperture (larger f-number) lets in less light and increases depth of field.
- ISO: Control the camera’s sensitivity to light. A higher ISO setting is useful in low light conditions but can introduce more noise, while a lower ISO setting is preferable for bright conditions and results in clearer images.
2. Focus Control
- Manual Focus: Adjust the focus manually using the EOS Utility interface. This is useful for precise control, especially in macro photography or when focusing on a specific point.
- Auto-Focus: You can select different auto-focus modes, such as single-point, zone, or automatic, depending on your subject and shooting conditions. The software allows you to set and adjust focus points remotely.
3. White Balance
- Preset White Balance: Choose from standard presets like Daylight, Shade, Tungsten, and Fluorescent to match your shooting environment.
- Custom White Balance: Set a custom white balance based on your shooting conditions to ensure accurate color reproduction. This is particularly useful in complex lighting situations.
- White Balance Adjustment: Fine-tune the white balance settings to correct any color cast and achieve the desired color temperature.
4. Picture Styles
- Selecting Styles: Choose from a range of picture styles such as Standard, Portrait, Landscape, and Monochrome. Each style applies specific color and contrast settings to achieve different looks.
- Customizing Styles: Modify settings within each picture style, such as contrast, sharpness, and color saturation, to create a unique visual effect.
- Saving Styles: Save customized picture styles for quick access and consistent results in your photography.
Using EOS Utility for Camera Settings Control
- Connect Your Camera: Ensure your camera is properly connected to your computer via USB or Wi-Fi.
- Launch EOS Utility: Open the software and select the “Remote Shooting” mode to access camera settings.
- Adjust Settings: Use the various control panels in EOS Utility to modify exposure, focus, white balance, and picture styles according to your needs.
- Apply and Test: Make adjustments and test the results to ensure they meet your requirements. You can make real-time changes and see how they affect your images.
Video Capture
1. Recording Settings
Configuring Video Resolution and Frame Rate
- Resolution: EOS Utility allows you to set the resolution of your video recordings. This can typically include options such as Full HD (1920×1080), HD (1280×720), or 4K (if supported by your camera). Higher resolutions provide more detail but require more storage space.
- Frame Rate: You can choose the frame rate for your video, commonly available options are 24 fps (frames per second) for a cinematic look, 30 fps for standard video, or 60 fps for smoother motion. Higher frame rates can also be used for slow-motion effects.
2. Remote Video Control
Starting and Stopping Video Recordings Remotely
- Starting Recording: Within the EOS Utility interface, you can initiate video recording remotely. This is particularly useful for scenarios where the camera is set up in a hard-to-reach location or for maintaining a steady shot.
- Stopping Recording: You can also stop the recording using EOS Utility, which provides convenient control without needing to physically interact with the camera.
Additional Features and Controls
- Audio Settings: Some versions of EOS Utility might allow you to adjust audio settings or monitor audio levels if your camera supports audio recording.
- Monitoring: EOS Utility often includes a live preview feature that lets you see what the camera is capturing in real-time, making it easier to frame your shots and ensure the recording is proceeding as planned.
Using EOS Utility for Video Capture
- Connect Your Camera: Ensure your camera is connected to your computer via USB or Wi-Fi.
- Open EOS Utility: Launch the EOS Utility software on your computer.
- Access Remote Shooting: Navigate to the remote shooting section where you can find options for video recording.
- Set Video Preferences: Adjust resolution, frame rate, and any other settings available.
- Start Recording: Use the EOS Utility interface to begin recording your video.
- Monitor and Control: Utilize the live view and controls to monitor and adjust as needed.
- Stop Recording: When finished, stop the recording using the EOS Utility interface.
Tips for Effective Video Capture
- Check Battery and Storage: Ensure your camera has sufficient battery life and storage space before starting a long recording session.
- Use a Tripod: For steady shots, consider using a tripod or stable surface.
- Plan Your Shots: Use the live view to plan and adjust your shots for optimal results.
Image Transfer and Management
1 Downloading Images
- Connecting Your Camera:
- Ensure your Canon camera is connected to your computer via USB or through a wireless connection, depending on your camera model.
- Open EOS Utility on your computer; it should detect the connected camera automatically.
- Transferring Images:
- Automatic Download:
- When you connect your camera, EOS Utility can automatically prompt you to download new images. You can choose to start the download process manually or set it to occur automatically.
- Manual Download:
- Navigate to the “Download” or “Transfer” option in EOS Utility. You can select specific images or folders you wish to transfer to your computer.
- Folder Selection:
- Choose the destination folder on your computer where the images will be saved. You can create new folders or select existing ones.
- Automatic Download:
2 Organizing and Tagging
- Image Organization:
- Folder Structure:
- Once images are downloaded, you can organize them into folders based on events, dates, or other criteria. EOS Utility allows you to sort and manage images before or after downloading.
- Renaming Files:
- Rename files if needed for better organization. EOS Utility often offers options to rename files based on date, time, or custom naming conventions.
- Folder Structure:
- Tagging Images:
- Metadata Addition:
- You can add metadata such as tags, descriptions, or keywords to your images within EOS Utility. This helps in categorizing and finding images later.
- Rating and Labeling:
- Some versions of EOS Utility provide options to rate or label images, making it easier to sort and find your best shots.
- Metadata Addition:
- Image Management Features:
- Preview and Selection:
- Use the preview function to review images before transferring. You can select which images to download and which to exclude.
- Batch Processing:
- EOS Utility may allow batch processing options, where you can apply actions like renaming or tagging to multiple images simultaneously.
- Preview and Selection:
3 Backup and Synchronization
- Creating Backups:
- Regularly back up your image files to external storage or cloud services to prevent data loss.
- Sync with Other Devices:
- If you use multiple devices, consider setting up synchronization options to keep your image files consistent across different platforms.
Firmware Updates
1. What is Firmware?
- Definition: Firmware is the software programmed into your camera’s hardware. It controls the camera’s functions and operations.
- Purpose: Firmware updates provide enhancements, bug fixes, and new features that can improve performance and compatibility.
2. Importance of Firmware Updates
- Enhanced Performance: Updates can optimize camera performance and improve functionality.
- New Features: Manufacturers may add new features or improve existing ones through firmware updates.
- Bug Fixes: Updates can address known issues or bugs in the current firmware version.
- Compatibility: Firmware updates can ensure compatibility with new accessories or software.
3. How to Check for Firmware Updates
- Using EOS Utility:
- Connect Your Camera: Ensure your camera is connected to your computer via USB and EOS Utility is open.
- Open Firmware Update Tool: In EOS Utility, go to the “Firmware” section.
- Check for Updates: The software will check for the latest firmware version available for your camera.
- Online Check:
- Visit Canon’s Official Website: Go to the support section of Canon’s website.
- Select Your Camera Model: Find and select your specific camera model.
- Check Firmware Version: Look for firmware updates and compare the version number with your current firmware.
4. How to Update Firmware
- Download the Firmware: Obtain the latest firmware version from Canon’s official website.
- Prepare Your Camera:
- Charge the Battery: Ensure your camera’s battery is fully charged to avoid interruptions during the update.
- Backup Settings: If possible, backup your current settings and data.
- Update Process:
- Insert Memory Card: Place the firmware update file onto a memory card.
- Enter Firmware Update Mode: Access the firmware update option through your camera’s menu.
- Follow Instructions: Follow the on-screen instructions to complete the update. Ensure you do not turn off the camera during the process.
5. Post-Update Checklist
- Verify Update: Confirm that the firmware version has been updated successfully by checking the camera’s menu.
- Test Functions: Test various functions of the camera to ensure they are working correctly with the new firmware.
6. Troubleshooting Firmware Updates
- Update Failure: If the update fails, ensure the firmware file is correct and try the process again. Refer to Canon’s support for detailed troubleshooting.
- Errors or Issues: If you encounter problems after the update, consult Canon’s support or forums for solutions.
Troubleshooting Common Issues
1 Connection Problems
Issue: Camera Not Recognized by EOS Utility
Possible Causes:
- Cable Issues: The USB cable might be damaged or not properly connected.
- Driver Problems: Outdated or missing drivers for your camera.
- Camera Settings: Incorrect settings on your camera for connecting to a computer.
Solutions:
- Check Cable and Connections: Ensure the USB cable is securely connected to both the camera and the computer. Try a different cable if possible.
- Update Drivers: Visit Canon’s website to download and install the latest drivers for your camera model.
- Camera Settings: Verify that the camera is set to the correct mode for connection (e.g., PC Connection mode) and that the USB settings are properly configured.
- Restart Devices: Restart both your camera and computer to reset connections.
2 Software Errors
Issue: EOS Utility Crashes or Freezes
Possible Causes:
- Software Conflicts: Conflicts with other software running on your computer.
- Outdated Software: Running an outdated version of EOS Utility.
- Corrupted Installation: Problems with the EOS Utility installation.
Solutions:
- Close Conflicting Software: Check for other programs that might be interfering with EOS Utility and close them.
- Update Software: Ensure you have the latest version of EOS Utility installed. Download updates from Canon’s website.
- Reinstall EOS Utility: Uninstall and then reinstall EOS Utility to resolve any installation issues. Make sure to follow Canon’s instructions for a clean installation.
3 Live View Issues
Issue: Live View Display Not Working
Possible Causes:
- Camera Compatibility: The camera model might not support Live View through EOS Utility.
- Connection Issues: Problems with the USB connection affecting Live View functionality.
- Software Bugs: Possible bugs or glitches in EOS Utility.
Solutions:
- Check Camera Model: Confirm that your camera model supports Live View via EOS Utility.
- Verify Connection: Ensure a stable USB connection and try reconnecting the camera.
- Update Software: Check for updates for EOS Utility, as newer versions may fix Live View bugs.
- Restart Equipment: Restart both the camera and computer to resolve any temporary issues.
4 Image Transfer Problems
Issue: Images Not Transferring to Computer
Possible Causes:
- File Format Issues: The camera might be saving images in a format not supported by EOS Utility.
- Insufficient Storage: The destination folder on the computer may be full.
- Software Configuration: Incorrect settings in EOS Utility for file transfer.
Solutions:
- Check File Format: Ensure the image file format (e.g., RAW, JPEG) is supported by EOS Utility.
- Free Up Space: Make sure there is enough storage space on your computer for new images.
- Adjust Settings: Verify the settings in EOS Utility for file transfer and adjust if necessary.
5 Firmware Update Issues
Issue: Firmware Update Fails
Possible Causes:
- Incompatible Firmware: The firmware version may not be compatible with your camera model.
- Update Process Disruption: Interruptions during the firmware update process.
- Battery Level: Low battery levels during the update process.
Solutions:
- Verify Compatibility: Ensure you are using the correct firmware version for your specific camera model.
- Avoid Interruptions: Perform the firmware update in a stable environment, avoiding interruptions.
- Check Battery: Ensure the camera’s battery is fully charged before starting the update process.
Conclusion
In conclusion, EOS Utility offers a range of powerful features that enhance your photography experience by allowing you to remotely control your Canon camera, manage settings, and handle image transfers. By familiarizing yourself with its functions—such as remote shooting, adjusting camera settings, and managing firmware updates—you can streamline your workflow and unlock new creative possibilities. Take the time to explore and experiment with EOS Utility to fully leverage its capabilities and make the most out of your Canon camera.